What an image transfer actually moves
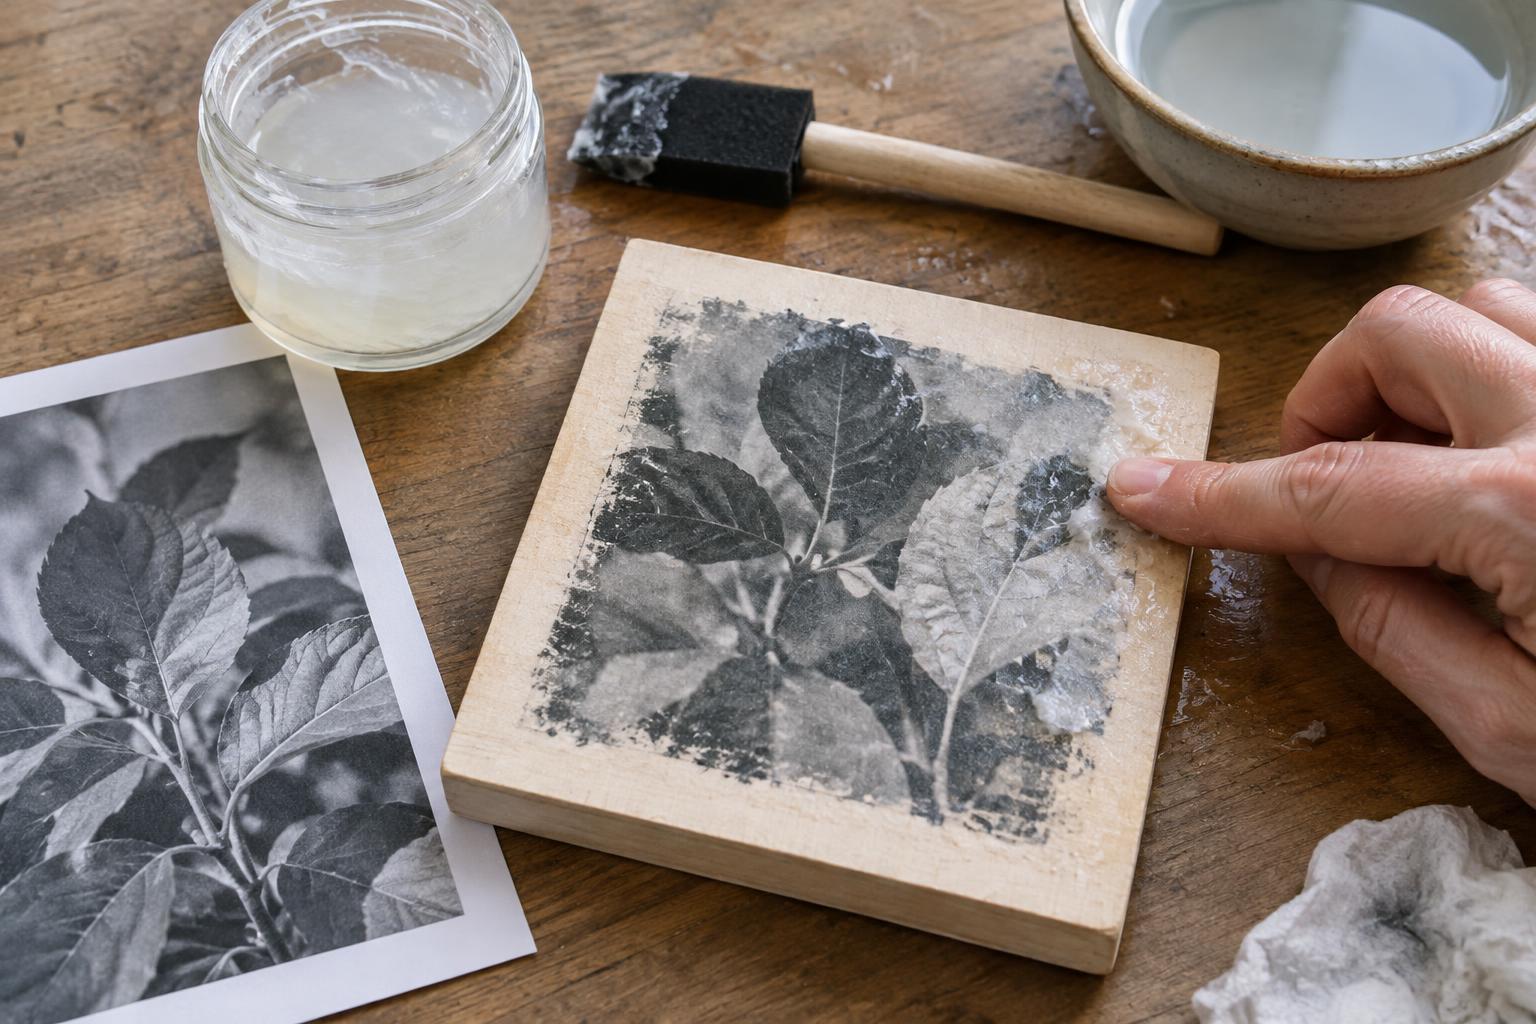
An image transfer is not simply a print glued face-up to a new support. In a common acrylic gel transfer, the printed side of a sheet is placed against wet gel medium. Once the gel has dried, the paper backing is dampened and rubbed away. The image remains embedded in the gel layer on the new surface. Small gaps, softened edges and traces of paper can become part of the work rather than defects to conceal.
This method is useful for combining photographic detail with the texture of wood, canvas or a painted panel. It also rewards a modest first experiment: a small image on a scrap of the intended surface will tell you more than committing a large composition immediately.
Choose a print and prepare the support
Start with a toner-based laser print or photocopy on ordinary paper. Inkjet prints may behave differently when wet, so do not assume that the same steps will work with one. Choose an image with clear contrast for your first attempt; very pale details may be hard to read after transfer. Because the printed face goes down, the finished image will be reversed. Flip the file before printing if words, numbers or orientation matter.
A smooth, clean surface gives the image more consistent contact. Sand rough wood lightly and remove the dust. If the support is highly absorbent, an acrylic ground can help keep the gel at the surface rather than letting it sink in. On canvas, a firm, primed area is easier to work on than loose fabric. Let any ground or paint dry before beginning. Different coatings and supports can affect adhesion, so test the exact combination you plan to use.
Apply the image with acrylic gel
Gather the print, acrylic gel medium, a brush or spreading tool, a clean cloth, water and the prepared support. Check the medium’s label for handling and drying guidance, and protect your work area. Spread a reasonably even layer of gel where the image will sit. Cover the printed area fully without leaving thick ridges that could blur fine details.
Place the print face-down onto the wet gel. From the center outward, press it gently with your fingers or a clean card to improve contact and push out air pockets. Keep the sheet still once it touches the gel: sliding it can smear the image or disturb the coating. Wipe away excess gel around the edges if you want a defined border. Then leave the piece undisturbed until the gel is thoroughly dry, following the product guidance rather than judging only by the exposed edges.
Remove the paper gradually
Dampen the back of the paper with water and give it time to soften. Rub gently with a fingertip or soft cloth. The paper should begin to roll away in small pieces, revealing the image beneath. Work in stages instead of trying to clear the whole sheet at once. Too much pressure can lift part of the transfer, especially around thin lines and corners.
After the surface dries, a whitish haze may appear. That usually means paper fibers remain. Moisten the area again and remove another fine layer, stopping when further rubbing seems more likely to damage the image than improve it. Allow the work to dry before deciding whether it needs a finish. If you choose to add a clear acrylic layer, test it first: it may deepen colors and change the sheen of the surface.
Use the results to guide the artwork
If a transfer looks patchy, consider whether the print made full contact with the gel. Uneven medium, air pockets or a strongly textured support can all leave gaps. If the image lifts during paper removal, the gel may not have dried fully, or the rubbing may have been too forceful. Change one variable at a time on your next test so you can see what made a difference.
A transferred image can be a starting layer rather than a finished picture. Try placing a fragment over a painted field, repeating it at different scales, or letting the support show through missing areas. Plan the composition before applying gel, but leave room for the material’s irregularities. The process is most useful when the image and its new surface contribute equally to what a viewer sees.