Start with the edge you want
Cutting is not just a way to separate one shape from another. In an artwork, the cut edge may remain visible, catch light, cast a shadow or reveal how a piece was made. Laser cutting and hand cutting offer different kinds of control, but neither produces a universally better finish. The useful question is what the material needs to do in the finished work.
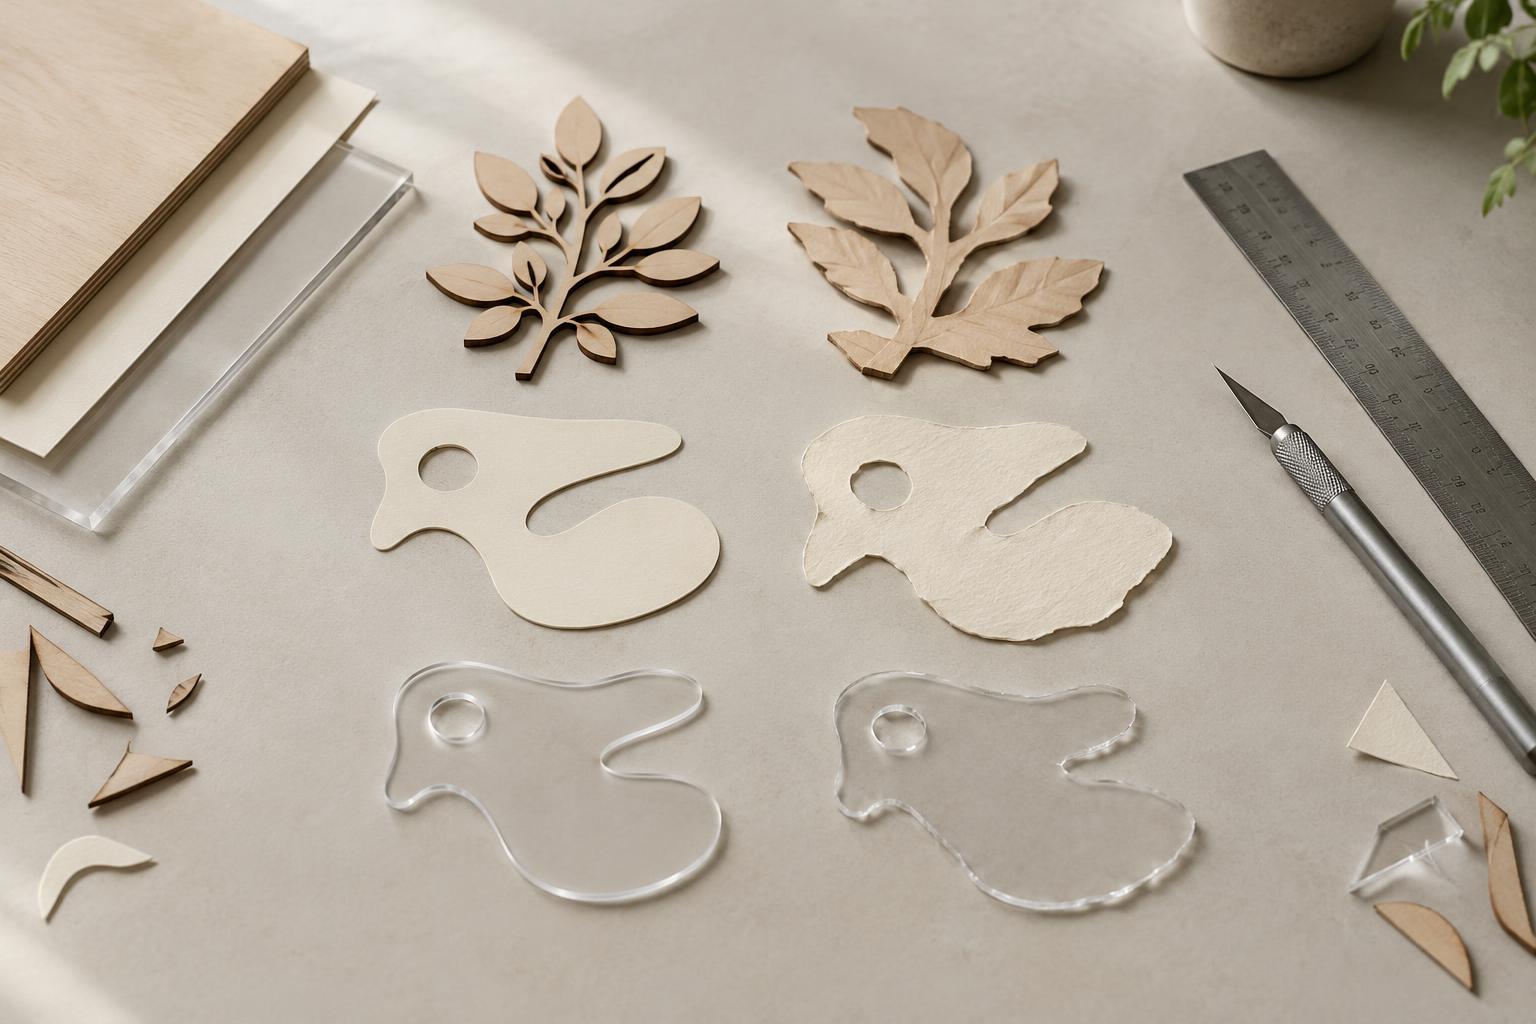
A laser follows a digital path without a blade pressing against the sheet. It can repeat intricate shapes and small openings with consistent placement. A hand tool gives the maker immediate physical feedback and allows adjustments as the cut develops. That flexibility matters with irregular, delicate or found materials. Before choosing a method, consider the material’s composition and thickness, the detail required, how many copies you need and whether the cut edge will be seen.
Know what each material permits
Paper and card can work with either method. A sharp knife and a firm cutting surface suit single pieces, changing shapes and cuts where pressure is part of the process. A laser can produce repeated fine details, but its heat may leave a brown edge or mark the surrounding surface. Thin paper can also shift if it is not held securely. A small sample will show whether those effects add to the work or distract from it.
Wood brings its own variation. Grain, density and adhesives in plywood can affect a laser cut, often producing darkened edges that may need cleaning or sanding. Saws and knives avoid heat marks, though they can leave splinters or tear-out, especially across the grain. Acrylic may develop a smooth-looking laser-cut edge, while a saw-cut edge often needs further finishing. Hand scoring and snapping can suit some simple cuts in suitable acrylic sheet, but it is less useful for intricate interior shapes.
Fabric and other flexible materials require particular care. Some synthetic fabrics may develop a sealed edge under laser heat; others can melt, curl or produce an unwanted finish. A blade or scissors may preserve the fabric’s texture but leave an edge that frays. Never assume an unfamiliar plastic, coating or composite is safe for a laser. Some materials, including PVC, can release hazardous and corrosive fumes when cut. Check the material’s identity and the equipment’s approved-material guidance rather than relying on appearance.
Compare the finish, not just the outline
Laser cutting removes material along a narrow path, often called a kerf. Heat can change the area beside that path: wood may char, paper may discolor and some plastics may melt or develop a raised lip. On a layered work, those marks can emphasize the outline. On a pale, minimal surface, they may be more noticeable than the shape itself. Masking, settings and cleanup may change the result, but they should be tested on the actual material.
Hand cutting has its own visible traces. A blade can compress fibers, wander slightly or leave a beveled edge; a saw may leave tool marks that need filing or sanding. These are not necessarily flaws. A lightly irregular edge can make a repeated form feel less mechanical, while a crisp laser-cut contour can make small differences between assembled layers easier to see. Decide whether consistency, evidence of touch or a combination of both serves the work.
Match the method to the geometry
Fine internal openings, repeated units and closely aligned layers often favor a digital cutting process, provided the material is suitable and the details are large enough to remain intact. Very narrow bridges of material can break during cutting or handling, regardless of how precisely they are drawn. Corners, slots and tabs also deserve a physical test: the width lost to a blade or laser can affect how parts fit together.
Hand cutting can be more responsive when an outline must follow an existing mark, a found object or a surface that is not perfectly flat. It can also be practical for one-off changes during assembly. Neither approach has to govern the entire piece. A laser-cut template can guide hand finishing, or hand-cut additions can interrupt an otherwise regular set of forms.
Make a sample that answers a real question
Before committing a full sheet, cut a small test containing the features that matter: a straight edge, a curve, a tight corner, a narrow opening and any joint you plan to use. View it under the lighting intended for the work, and check both faces as well as the edge. If the piece will be painted, glued, folded or handled frequently, try those steps on the sample too.
The best method is the one that leaves you with a useful object, not simply an accurate outline. Material compatibility and safe operation come first; then assess the finish, the amount of cleanup and the role of the cut in the work. Sometimes the decisive detail is a clean repeated slot. Sometimes it is an edge that still shows the movement of a hand.