Start by observing the surface
Surface preparation is not simply a step to complete before the interesting work begins. It affects how paint moves, how color appears and whether the finished layer stays attached. A porous material, such as raw wood, uncoated paper or untreated canvas, can draw liquid from paint into its fibers. A nonporous material, such as glass, metal or some plastics, offers little for the paint to soak into. Both can be painted, but they call for different preparation.
Before choosing a primer, look for dust, grease, loose fibers, glossy coatings and signs of moisture. A drop of water on an inconspicuous area can offer a rough clue about absorbency: it may darken and spread on a porous surface or remain beaded on a slick one. This is only an observation, not a guarantee of paint compatibility. For an unfamiliar material, prepare a small sample with the intended paint system and let it dry or cure as directed before committing to the full piece.
Seal absorbent materials without losing their character
Porous supports can absorb paint unevenly, leaving dull patches or making a brushstroke difficult to control. Removing loose dust and debris is the first step. Raw wood may benefit from light sanding along the grain, followed by thorough dust removal. Rough canvas may need stray fibers trimmed rather than pressed into wet paint. Paper should be chosen with the expected amount of moisture in mind; thin sheets may buckle when given heavy water-based coats.
A compatible size, sealer or primer can reduce absorbency and create a more consistent painting ground. The choice depends on both the support and the paint. An acrylic-based ground, for example, is often used to prepare supports for acrylic painting, but product directions should guide its use with other media. Apply thin, even coats rather than trying to fill every irregularity at once, and allow each coat to dry as directed. If the material's natural texture is central to the work, test whether a clear preparation preserves it well enough for your purpose.
Give smooth surfaces a reliable foundation
On nonporous surfaces, the main concern is often adhesion. Skin oils, fingerprints, polishing compounds and manufacturing residues can interfere with paint even when a panel looks clean. Wash or wipe the surface using a method appropriate to the material, then let it dry completely. A clean cloth helps avoid leaving lint behind. If a solvent or specialty cleaner is called for, follow its label and use it in a suitably ventilated workspace.
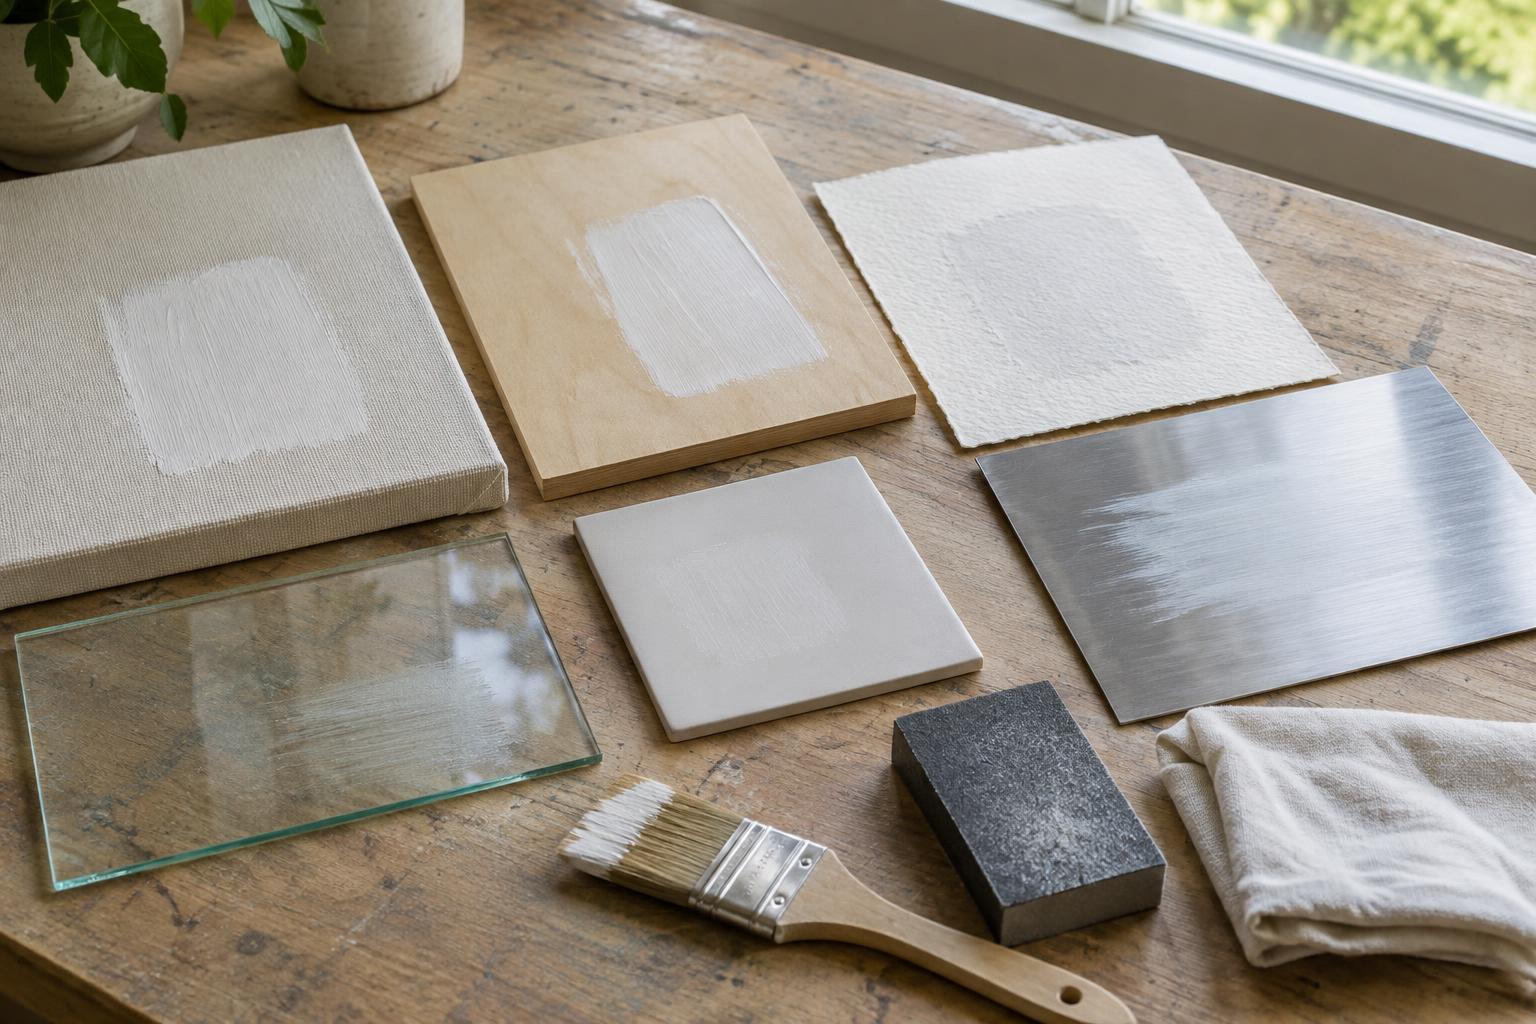
Some smooth supports can be lightly abraded to provide more texture, but abrasion is not suitable for every surface or finish. It can scratch clear materials, damage thin coatings or create dust that needs careful handling. A primer formulated for the particular substrate may be more useful than a general-purpose ground, especially on glass, metal or plastic. Check the primer and paint labels for compatibility with each other. A small test area can reveal problems such as beading, peeling or unexpected changes in sheen before those problems cover an entire artwork.
Match preparation to the way the work will be used
An experimental study on a small panel has different demands from a painted object that will be handled, moved or installed outdoors. Flexing, temperature changes, frequent touch and exposure to water can all challenge a paint layer. Consider the work's intended setting when selecting a support, ground and finish. A coating that performs well on an indoor wall piece may not be appropriate for a flexible sculpture or an exterior installation.
Preparation also shapes the visual result. A sealed, smooth ground can hold crisp edges and make transparent layers more predictable. An absorbent, textured ground may encourage stains, skips and variations in color. Neither effect is inherently better. The aim is to make the behavior of the materials an informed choice rather than an unwanted surprise. Keep notes on the support, cleaning method, primer and number of coats so a successful test can be repeated.
Use a simple test before painting at scale
Make a sample from the same material as the final work and prepare it in the same way. Paint a few marks that represent the planned process: a thin wash, an opaque passage and any layered or heavily worked area. Look for uneven absorption, tackiness, lifting or paint that pulls away from the surface. Allow the sample the drying or curing time specified for the products before judging how firmly the layers have attached.
If the result is unsatisfactory, change one part of the process at a time. Cleaning more carefully, choosing a different primer or adjusting the number of coats may each produce a different result. This small pause can save materials while leaving room for experimentation. Good preparation does not have to hide the identity of a surface; it can help the artist decide how much of that surface remains visible in the finished work.